A practical, evidence-aware workflow for preparing an image, using AIAI’s automated background-removal transformation, inspecting the transparent cutout, and addressing common edge problems before reuse.
For alternative tools and the completed remove.bg control test, see the background-remover tools and evidence guide.
What the AIAI Image Background Remover Does
AI background removal separates a foreground subject from its surroundings and can return the subject as a transparent cutout. According to AIAI’s vendor-authored description, its process begins with an uploaded image, detects the primary subject, defines its edges, removes the background, and produces a transparent result.
That description explains the intended workflow, but it should not be treated as an independent test of accuracy, speed, or output quality. Results can vary with the source image, especially when the subject has hair, fur, delicate textures, intricate contours, shadows, or semi-transparent details. The practical objective is therefore not merely to obtain a cutout, but to obtain one that remains usable after its edges and remaining background areas have been inspected.
Prepare Your Source Image
Start with a clear, well-lit image in which the intended subject is visibly distinct from the background. Make sure the whole subject is present in the frame; missing or cropped portions cannot be recovered simply by removing the background.
Weak contrast, low image quality, strong shadows, and visually complex scenes can make subject separation more difficult. For a challenging image, one supplied guide recommends adjusting brightness or contrast, reducing noise, and confirming that the intended subject is complete before processing. These changes may give the automated system a clearer boundary to identify.
Preparation is especially important for product-image batches. Using source photos with similarly clear lighting and subject separation creates a more consistent starting point, although it does not guarantee identical results. Preserve the original files so that you can preprocess them differently or try again if fine details disappear.
Follow the AIAI Background-Removal Workflow
The supplied AIAI source describes a concise process:
1. Upload the image containing the subject you want to isolate. 2. Allow the system to identify the primary subject automatically. 3. Let the transformation define the subject’s edges and remove the surrounding background. 4. Review the returned transparent cutout before placing it into another design.
In eWiki’s live check on September 13, 2026, the loaded AIAI interface showed a 14-credit Generate action. The screen did not establish a monetary value for those credits, and credit requirements can change, so confirm the current interface before committing to a workflow or budget.
Treat the automated result as an intermediate asset rather than a finished deliverable. Before using it in a listing, profile image, marketing asset, or composite design, inspect the subject boundary and confirm that important details remain intact.
Live verification: upload and login gate (September 13, 2026)
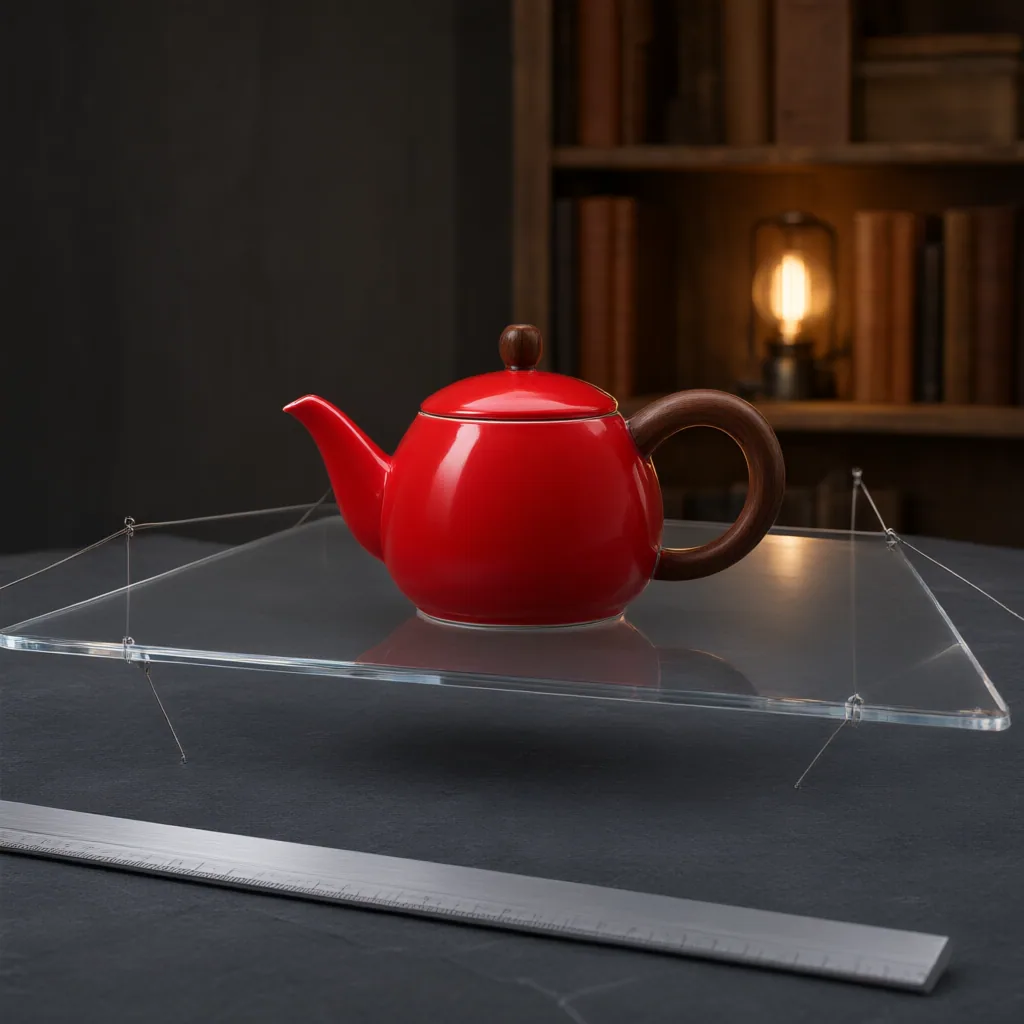
eWiki used a controlled, AI-generated product scene containing no person, customer data, private material, or third-party brand. The 1024×1024 WebP uploaded successfully on AIAI’s public background-remover page.
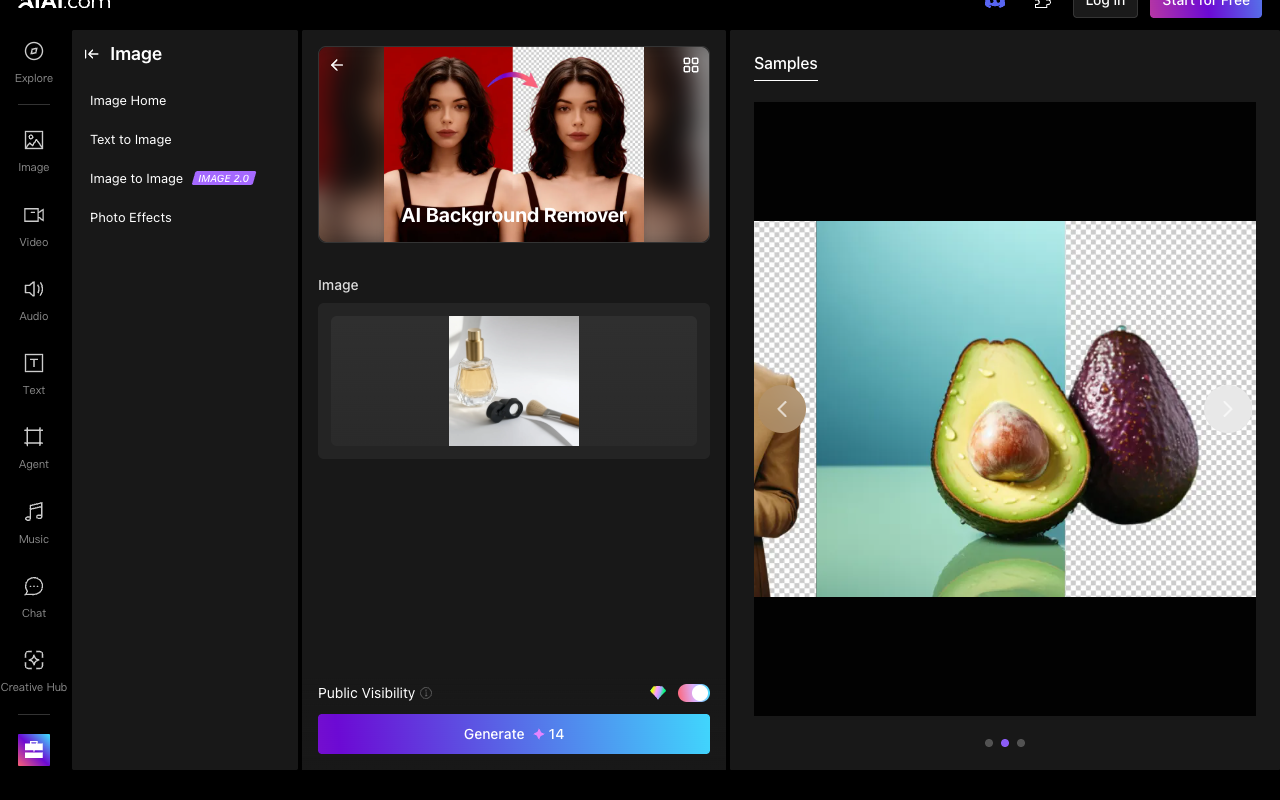
During this browser session, attempts to switch Public Visibility off did not change the control. Treat this as a privacy checkpoint: use non-sensitive test material and verify the switch state yourself before uploading anything private.

Because the run stopped at authentication, eWiki did not obtain an AIAI output and makes no claim about AIAI cutout quality, speed, export resolution, or success rate. This evidence verifies the public upload path and the current login/credit/privacy conditions only.
Read eWiki’s testing method for how a single observed run is separated from broader product claims.
Inspect the Cutout Before Using It
Examine the transparent cutout closely before publishing or compositing it. Pay particular attention to hair, fur, intricate contours, shadows, and semi-transparent details. These areas can reveal jagged boundaries, missing fine features, or traces of the original background.
Check the entire outline rather than looking only at the most prominent edge. A cutout that appears acceptable at first glance may still contain remnants around narrow gaps or complicated textures. Shadows also deserve separate attention because they can be mistaken for part of either the subject or the removed background.
Inspection matters even when the tool completes the transformation automatically. Automated processing reduces the manual work involved in separating a subject, but the supplied sources acknowledge that the output may still need edge refinement, shadow adjustment, or other post-processing.
Troubleshoot Difficult Images and Imperfect Edges
If the cutout has rough edges or missing details, first consider the source image. Low resolution can leave too little detail for precise separation. Weak foreground-background contrast can make the subject boundary ambiguous, while complex scenes and strong shadows can interfere with detection.
For a difficult image, try preparing the source again by adjusting brightness or contrast and reducing visible noise. Confirm that the complete intended subject remains within the frame. A clearer source may be more useful than repeatedly processing the same problematic version.
When most of the cutout is usable, post-processing may be enough. Refine imprecise edges, remove remaining fragments of the original background, and assess whether shadows should be preserved, modified, or separated from the subject. Give extra attention to hair, fur, fine contours, and semi-transparent areas because broad corrections can erase details that should remain.
These steps are practical responses to known problem conditions, not guarantees of a perfect result. The supplied material does not include independent measurements of AIAI’s precision or success rate.
Place the Transparent Cutout on a New Background
A transparent cutout can be reused on a white background, a solid color, or another replacement image. Potential applications identified in the supplied sources include product listings, profile images, marketing materials, and composite designs.
Choose the replacement background according to the final task, then inspect the composite as a whole. A subject edge that seemed acceptable against transparency may become more noticeable against a contrasting color or image. Residual background pixels, uneven contours, and shadow problems may also be easier to see after placement.
The transparent output may therefore require additional refinement before it becomes a finished asset. Review the edge treatment and shadows after compositing, and confirm that the subject remains complete and visually distinct from its new surroundings.
Build a Repeatable Ecommerce Image Workflow
For multiple product listings, use the same sequence for every image: prepare the source, remove its background, inspect the cutout, refine defects where needed, and apply the chosen replacement background. This provides a repeatable structure for producing product cutouts, even though individual images may require different amounts of correction.
Begin with clear, well-lit product photos and visible separation between each product and its background. After processing, examine fine contours, shadows, missing details, and leftover background areas. Correct those issues before placing the cutout on the selected listing background.
Consistency depends on more than automated removal. Apply the same inspection criteria across the batch and avoid treating an automatically generated cutout as complete until it has been reviewed. Keep the original images available so difficult items can be prepared again if necessary.
Limitations and Details to Verify Before Use
eWiki verified that a 1024×1024 WebP uploaded successfully on September 13, 2026. The interface accepted PNG, WebP, JPG, and JPEG files up to 20 MB, showed a 14-credit Generate action, and required login before producing this test result. Supported formats, limits, credits, account requirements, output resolution, and availability can change; confirm them in the current interface.
The sources are vendor-authored guides rather than independent evaluations. Consequently, they do not establish independently tested results for quality, precision, or speed. The absence of supplied product records also means this guide should not be read as a comparative product review or ranking.
Start with a clear, well-lit image, run the transformation, and inspect fine edges and leftover background areas before using the cutout in a listing, profile image, marketing asset, or composite design.
Disclosures and limitations
– This article was prepared with AI assistance using only the supplied research package and approved content plan. – The supporting materials are vendor-authored sources, not independent product tests. Claims about quality, precision, speed, supported formats, output resolution, current availability, and monetary pricing were not independently verified. – The supplied research does not establish an affiliate relationship. Product references are not endorsements; if the publisher later adds affiliate links or another commercial relationship, that relationship should be disclosed clearly to readers.
Sources
– AI Background Remover Guide 2026 | Remove BG Instantly – PixCraftAI — PixCraftAI – Complete Guide to AI Background Removal: From Beginner to Expert – AI Tool to Remove Objects, Backgrounds, and Watermarks | Remove Anything — Remove Anything – AI Background Remover: Effortlessly Cut Out Subjects with AIAI.com — AIAI.com Blog – AI Background Remover – Free Remove Image Background Online — photogpt.io
Improve this guide
Report a problem or suggest the next question
Submissions enter a private editorial queue. They are reviewed and deduplicated before any public update or new page is created.