Documentation screenshot retained on 23 October 2026. Source: ComfyUI inpainting guide.
Build a masked inpainting workflow in ComfyUI with the documented inpainting checkpoint, Load Image, MaskEditor, VAE Encoder (for Inpainting), prompts, and KSampler seeds.
What masked inpainting does in ComfyUI
The official ComfyUI inpainting guide describes inpainting as a way to modify selected parts of an image when the overall image is otherwise satisfactory. Its examples include removing unwanted objects, repairing incorrect generated details, changing clothing textures, and adjusting facial expressions.
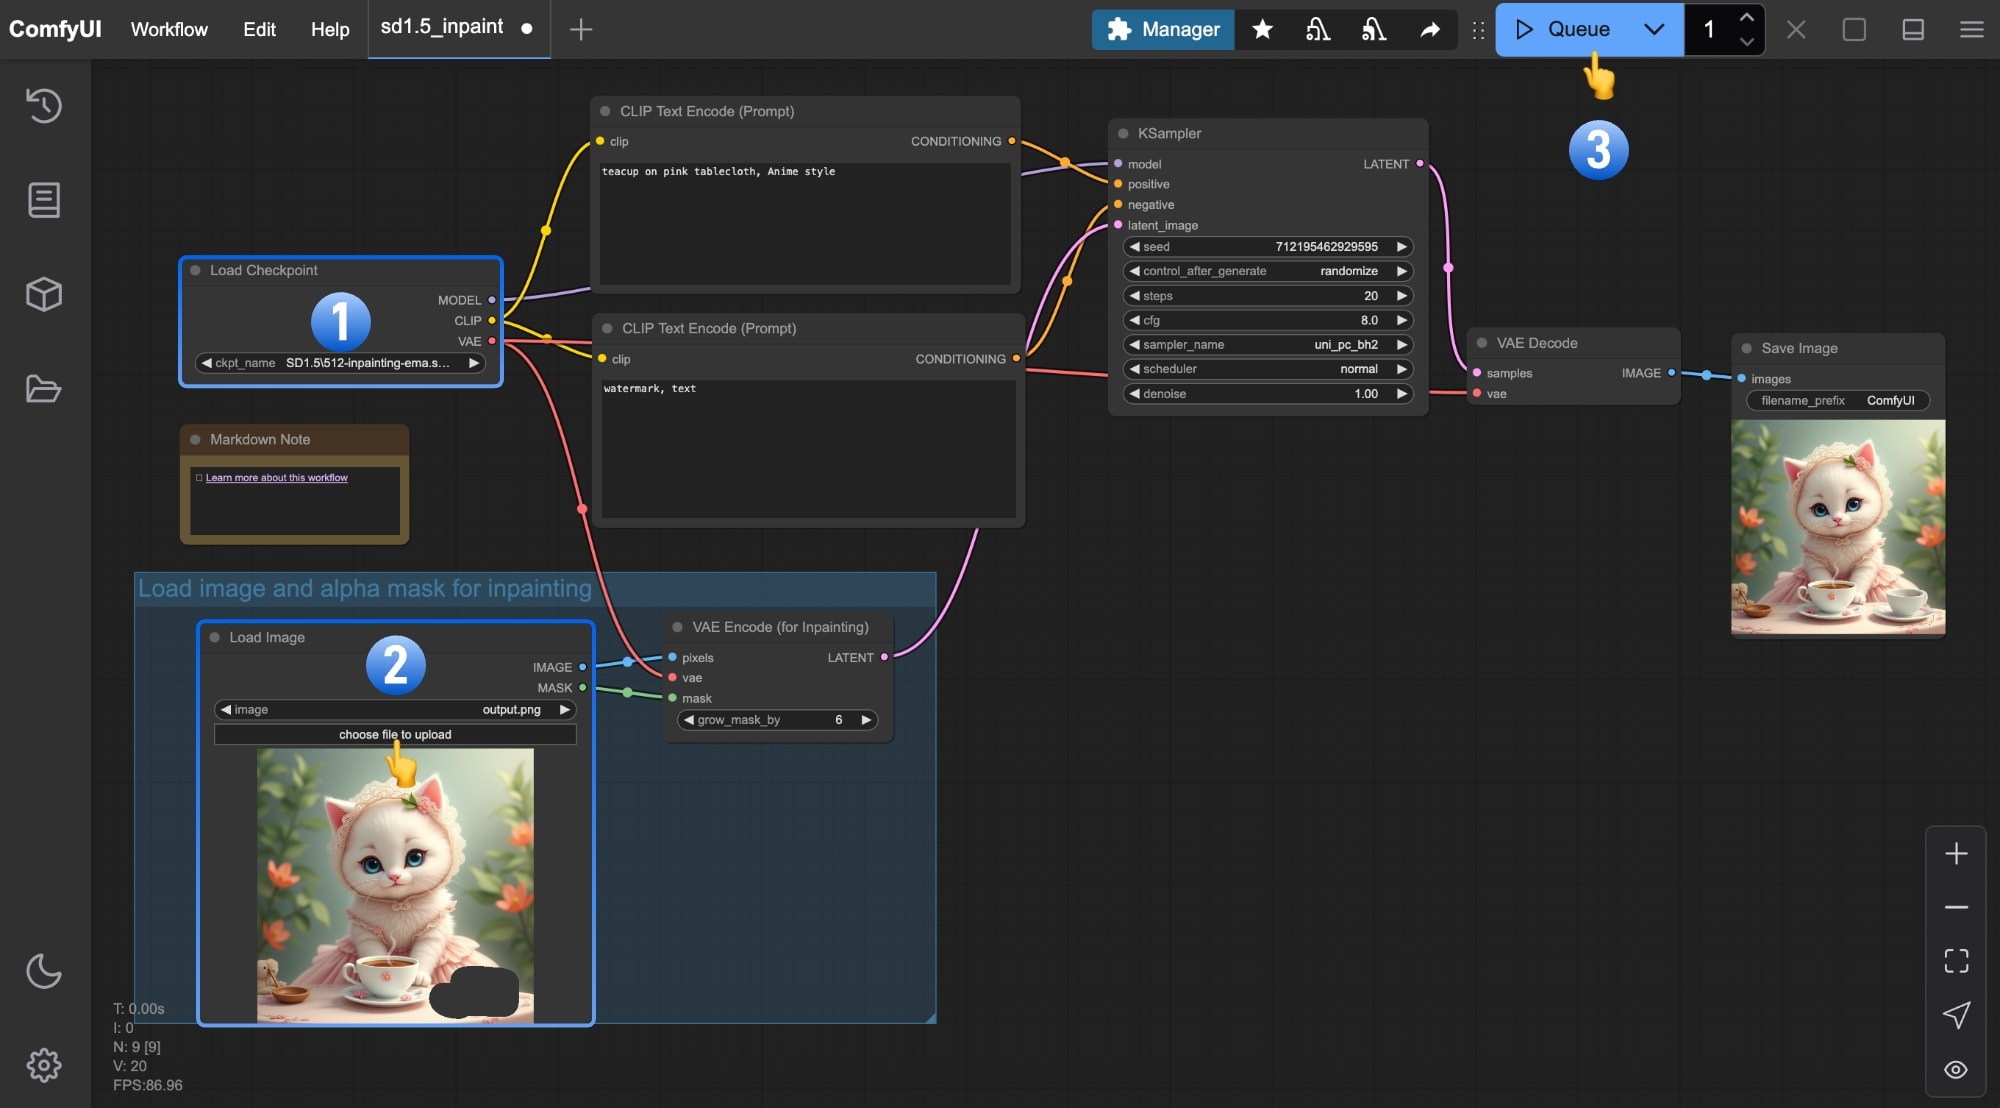
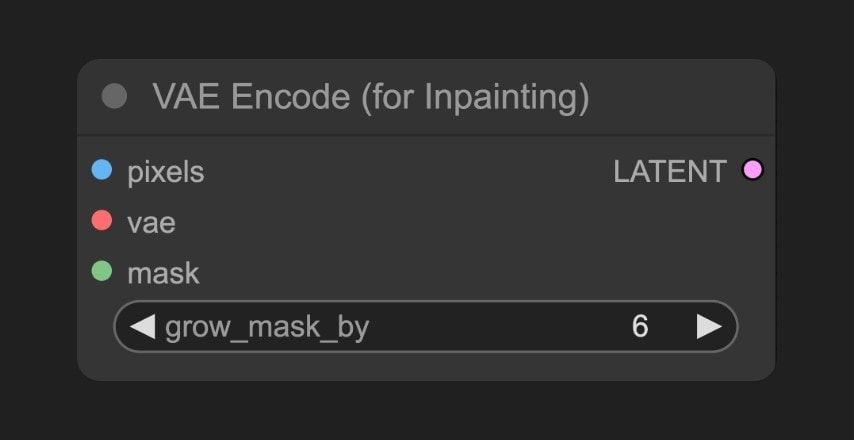
In the documented masked inpainting workflow in ComfyUI, a mask identifies the area requiring modification. The VAE Encoder (for Inpainting) receives the input image, VAE model, and mask, then produces a latent representation for the workflow. Its grow_mask_by input expands the original mask by a specified pixel value to provide a transition area around the masked region.
For a first attempt, I suggest choosing one clearly defined area to edit. This is an editorial recommendation intended to make the result easier to assess; it is not a guaranteed way to improve output quality.
Documentation screenshot retained on 23 October 2026. Source: ComfyUI inpainting guide.
Prepare the checkpoint, image, and workflow
The official tutorial instructs users to download 512-inpainting-ema.safetensors and place it in ComfyUI/models/checkpoints. In its example workflow, Load Checkpoint must load that file, while Load Image receives the input image.
The tutorial also provides a workflow image whose metadata contains workflow JSON. According to the documentation, that image can be dragged into ComfyUI, or opened through Workflows → Open; the documented keyboard shortcut for opening a workflow is Ctrl+O.
The supplied example image already has an alpha transparency channel marking the area to edit, so that particular asset does not require a manually drawn mask. If you use another image, I suggest following the documented MaskEditor procedure in the next section rather than assuming that the image already contains suitable transparency information.
Documentation screenshot retained on 23 October 2026. Source: ComfyUI inpainting guide.
Create and connect the mask
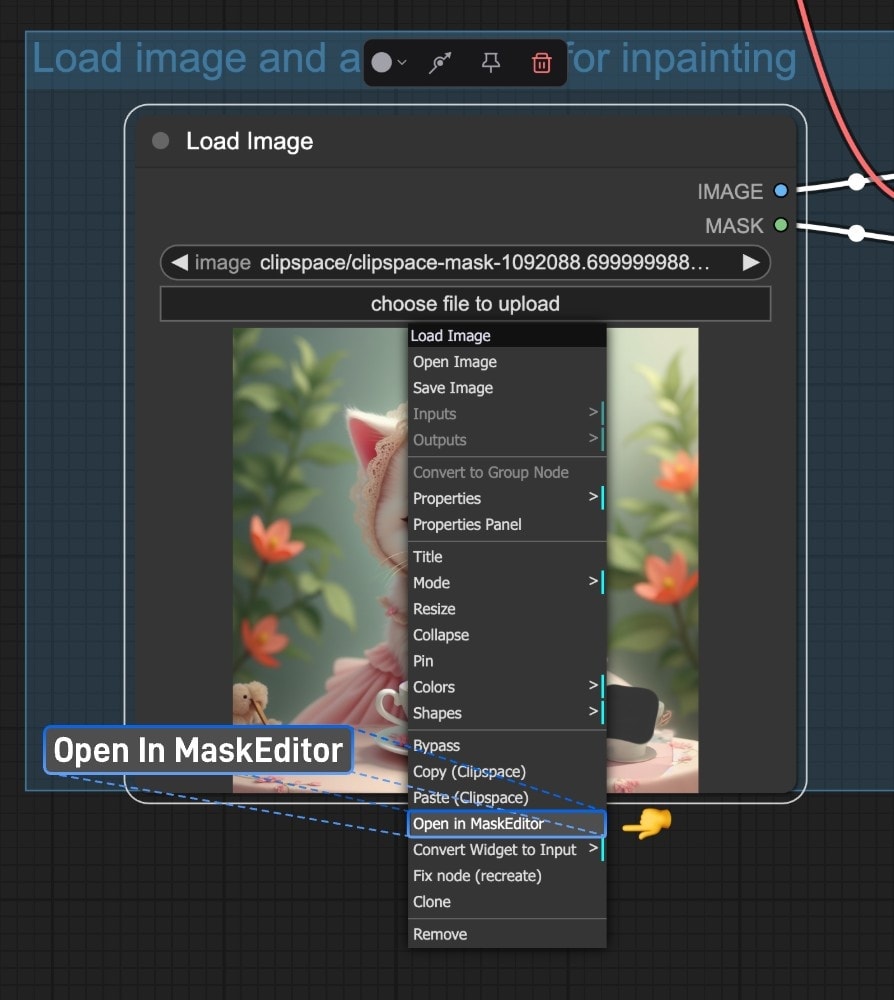
The documented MaskEditor sequence begins by right-clicking Save Image and selecting Copy (Clipspace). Next, right-click Load Image and select Paste (Clipspace). Right-click Load Image once more and choose Open in MaskEditor.
Inside MaskEditor, adjust the brush parameters in the right panel and draw the mask. The official instructions say that the eraser can correct mistakes and that Save finishes the mask. The drawn content is then used as the mask input to VAE Encoder (for Inpainting).
The node’s documented inputs are pixels, vae, mask, and grow_mask_by. Here, pixels is the image being encoded, vae is the VAE model, and mask specifies the area that needs modification. I suggest checking the mask boundary before saving it, because that gives you an opportunity to correct visible painting mistakes with the documented eraser tool.
Generate and refine the inpainted result
After confirming that Load Checkpoint uses 512-inpainting-ema.safetensors and uploading the input through Load Image, select Queue or press Ctrl+Enter to generate, as specified in the official workflow instructions.
For refinement, the documentation recommends making the positive and negative prompts more specific. It also recommends running the workflow with different KSampler seeds to obtain different generation results. After learning the MaskEditor process, users can mask a generated result and inpaint it again.
A practical sequence I suggest is to generate once, inspect the edited area, and then change only one controllable element—such as prompt wording, the KSampler seed, or the mask—before the next run. That sequence is an editorial suggestion for comparing iterations; the documentation does not guarantee that any particular adjustment will produce a satisfactory result.
Conclusion
For the documented masked inpainting workflow in ComfyUI, use the inpainting checkpoint in Load Checkpoint, supply the image through Load Image, create or provide the mask, and connect that mask to VAE Encoder (for Inpainting). Then adjust the prompts and start generation with Queue or Ctrl+Enter, following the official ComfyUI guide.
My practical recommendation is to begin with the official example workflow and its specified 512-inpainting-ema.safetensors checkpoint. Make one localized mask, save it, and generate a baseline result. If further work is needed, I suggest revising the prompt, trying another KSampler seed, or masking the result for another pass. These are documented adjustment options, but the order presented here is an editorial recommendation and does not promise a particular outcome.
Sources
Disclosure
This article was prepared with AI assistance.
Improve this guide
Report a problem or suggest the next question
Submissions enter a private editorial queue. They are reviewed and deduplicated before any public update or new page is created.